
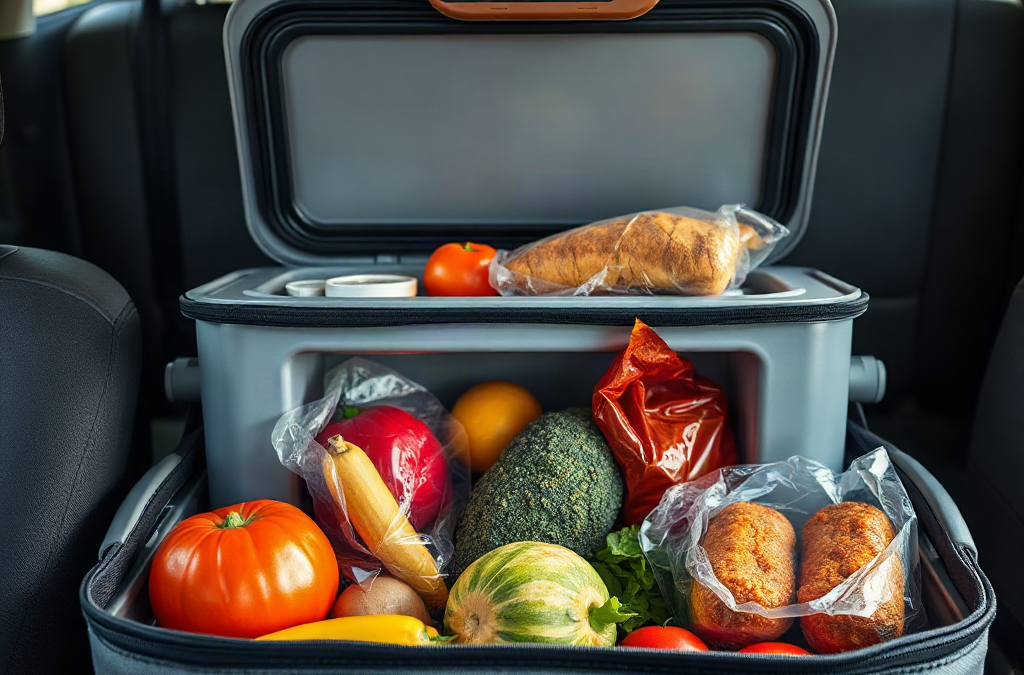
Keep perishable organic foods in a travel cooler at 40°F (4°C) or below, checking an appliance thermometer before departure, at meal stops, and whenever the cooler has been opened repeatedly or left in a warm place. Measure the air near vulnerable foods rather than relying on how cold the lid or ice feels. Pack prechilled dairy, eggs, meat, seafood, cut produce, and prepared dishes between cold sources, with raw animal foods sealed separately. If the thermometer rises above the safe range, add ice promptly and assess both elapsed time and individual food temperatures; organic certification does not change refrigeration requirements or make temperature-abused food safer.
Which Organic Foods Need Temperature Control?
Organic certification describes how an agricultural product was produced and handled; it does not remove the need for refrigeration. An organic yogurt, cooked chicken, egg salad, or container of cut melon faces the same temperature-related microbial hazards as its conventional counterpart. The useful distinction for cooler packing is therefore not organic versus conventional, but perishable versus shelf-stable.

Foods that normally require refrigeration should remain cold throughout the trip. Common examples include milk, yogurt, soft cheese, eggs, meat, poultry, seafood, tofu, cooked grains, leftovers, deli-style salads, hummus, sprouts, cut leafy greens, and sliced fruit. Prepared meals containing these ingredients also need cold control. A sealed package does not automatically make a product shelf-stable; follow the storage statement on the label and treat anything sold refrigerated as perishable unless the manufacturer says otherwise.
Whole, intact produce is more situation-dependent. Uncut apples, oranges, carrots, and similar produce can often travel without ice for a short trip if they are clean, dry, and protected from excessive heat. Once produce is peeled, sliced, cooked, or mixed into a moist dish, refrigeration becomes more important. A whole watermelon and a tub of cut watermelon should not be assigned the same place in the car: the whole fruit may ride outside the cooler, while the cut fruit belongs deep in the cold zone.
Some quality changes can be mistaken for safety evidence. Wilted greens, separated yogurt, or softened cheese may signal poor temperature control, but normal appearance and smell cannot prove that a perishable food remained safe. Conversely, harmless condensation on a package may simply result from moving it between temperature zones. A thermometer and a record of time provide better decision support than sensory checks alone.
Before packing, divide the trip food into three groups: refrigerated perishables, frozen items, and shelf-stable supplies. Nut butter, unopened shelf-stable beverages, whole fruit, dry crackers, and canned foods can stay outside the cooler unless their labels require refrigeration. Removing them creates room for more ice around the foods that truly need it. A common failure is filling limited cooler space with cold drinks while vulnerable meals sit near the warm lid; a separate beverage cooler is preferable when space and budget permit.
How Should You Pack and Measure a Travel Cooler?
A reliable check begins before the thermometer reading: prechill the food, cooler, and cold sources rather than asking warm ice packs to cool groceries after loading. A cooler slows heat transfer but does not actively refrigerate like a powered refrigerator. Warm containers, empty air space, direct sunlight, and repeated opening all increase the cold load and shorten the useful life of the ice.
Use an appliance thermometer that can remain in the cooler, plus a clean food thermometer if you may need to test an individual item. Place the appliance thermometer in the central food zone near the most temperature-sensitive packages, not directly against an ice pack. Contact with ice can produce an artificially reassuring reading while food near the top is warmer. If the cooler is large or layered, a second thermometer near the upper zone can reveal temperature differences that one sensor misses.
Pack in layers. Put a cold source at the bottom, arrange prechilled foods closely, fill spaces with additional ice or frozen packs, and add another cold layer on top because warm air enters when the lid opens. Keep raw meat, poultry, and seafood in leak-resistant packaging and physically separated from ready-to-eat produce, dairy, and prepared meals. A rigid secondary container can limit leakage without depending on a thin grocery bag.
| Check point | What to examine | Useful response |
|---|---|---|
| Before loading | Food is already cold; thermometer responds normally | Prechill warm items and replace a doubtful thermometer |
| After packing | Sensor sits near perishables, away from direct ice contact | Reposition it before closing the lid |
| During travel | Reading, remaining solid ice, lid use, and cooler location | Add cold sources or move the cooler out of heat |
| At destination | Cooler reading plus the temperature of questionable foods | Refrigerate promptly or assess whether disposal is safer |
Loose ice usually conforms around packages better than a few rigid packs, but melting water can damage paper cartons and contaminate food if packaging leaks. Frozen bottles and reusable packs are cleaner and easier to manage, though gaps between them can create warm pockets. A combination often works well: durable packs for the main cold mass and bagged ice that can be replenished during a longer drive.
Do not use the temperature of a beverage touching ice as a substitute for the cooler’s overall condition. Instead, confirm that the central zone holds at 40°F (4°C) or below and inspect the warmer upper area when the cooler is crowded. A stable reading, solid cold sources, and genuinely chilled packages indicate that the setup is working. Rising readings, rapidly melted ice, warm upper packages, or frequent lid opening indicate that the cooling margin is shrinking.
When Should You Recheck the Temperature?
Recheck at moments when conditions change rather than following a rigid schedule that ignores the trip. A useful routine is to read the thermometer immediately after packing, at planned meal or fuel stops, after several lid openings, and upon arrival. Check sooner if the cooler has been in a hot parked vehicle, exposed to sun, moved into an unconditioned cargo area, or opened for an extended roadside meal.
Trip length alone does not determine check frequency. A tightly packed high-quality cooler kept inside an air-conditioned passenger compartment may retain cold better than a lightly packed cooler in a sun-heated trunk, even on a shorter drive. Outside temperature, insulation, food mass, starting temperature, ice quantity, and lid activity interact. The thermometer turns those variables into an observable condition, but it cannot reconstruct how long food was warm if nobody noted when the reading changed.
Make checks quick and purposeful. Decide what you need before opening the lid, read a display visible through a window if the cooler supports one, or position the thermometer so it can be seen immediately. Retrieve several meal components at once rather than opening the cooler separately for yogurt, fruit, and drinks. Every opening replaces some cold air with warmer air and exposes upper packages to external heat.
A simple travel note can record departure time, cooler temperature at each stop, whether ice was added, and any unusual exposure. This does not need to become a complicated log. Its value appears when a late reading is high: knowing that the cooler was cold 30 minutes earlier supports a different decision than discovering the same reading after several unmonitored hours.
Consider the route before departure. Identify places where replacement ice is likely to be available, particularly for remote drives, ferry waits, camping arrivals, or hotel stays without dependable refrigeration. An electric travel cooler can reduce dependence on melting ice, but only while it has power and adequate ventilation. Some units cool relative to surrounding air rather than maintaining a fixed refrigerator temperature, so their displayed setting should be verified with an independent thermometer.
The weakest approach is checking only at the destination. By then, a high reading may leave too much uncertainty about duration. Intermediate checks create opportunities to move the cooler into shade, replenish ice, reduce beverage access, or transfer food to working refrigeration before the situation becomes ambiguous.
What Should You Do When the Cooler Gets Too Warm?
A reading above 40°F (4°C) calls for a time-and-temperature assessment, not an automatic declaration that every item is safe or spoiled. First close the lid, move the cooler away from heat, and add fresh ice or frozen packs. Then determine when the cooler was last known to be cold and use a clean food thermometer to check representative high-risk items, especially cooked dishes, dairy products, meat, seafood, eggs, and cut produce.
Food-safety agencies generally advise limiting the cumulative time perishable food spends above refrigerator temperature, with a shorter allowance in very hot conditions. Because a cooler-air reading can rise faster than the center of a dense food, an individual food measurement may provide useful additional evidence. It does not erase an unknown history, however. A cold center cannot prove that the surface or another package stayed cold, and putting questionable food back on ice does not reverse microbial growth that may already have occurred.
Prioritize items by consequence and evidence. Frozen food that still contains ice crystals presents a different situation from warm egg salad with no reliable timeline. An unopened hard cheese may tolerate travel conditions differently from soft fresh cheese, while shelf-stable unopened products were never dependent on the cooler. Consult the package instructions and current government food-safety guidance for food-specific decisions rather than applying one assumption to the entire load.
When the duration above the safe range is unknown, discarding vulnerable perishables is the lower-risk choice. Do not taste food to test its safety, and do not depend on smell, color, an organic label, or expensive ingredients as reasons to keep it. Cost can create pressure to rationalize an uncertain item, but replacement cost does not change the temperature history.
After the trip, investigate why control was lost. Too little ice, warm food loaded at departure, a thermometer placed against a frozen pack, excessive empty space, direct sun, and a frequently opened drink cooler are common operational causes. Correct the specific weakness for the return journey. If melted ice contacted leaking raw-food packaging, discard exposed ready-to-eat foods and clean the cooler thoroughly before reuse. Wash removable parts according to their instructions, then dry the interior to limit odors and mold growth.
Successful recovery is visible when the central cooler reading returns to 40°F or below, replacement ice remains present, and tested foods are cold with a known exposure history. Continued rising temperature, no available ice, uncertain elapsed time, or warm high-risk foods signals that refrigeration can no longer be assumed.
Conclusion
Dependable cooler control comes from combining measurements with a known timeline. Classify foods before packing, chill everything in advance, surround priority perishables with cold sources, and position the thermometer where it reflects the food zone rather than the nearest ice pack. During travel, check whenever heat exposure or lid use changes the conditions, and record enough information to interpret an unexpected rise.
If the cooler warms, restore cooling immediately but assess questionable items individually. Food type, measured temperature, and elapsed time matter more than appearance, price, or an organic claim. For the next trip, correct the operational cause—whether inadequate ice, poor placement, direct sun, or beverage traffic—and use a separate drink cooler when repeated access is unavoidable.
Frequently Asked Questions
What temperature should a travel cooler maintain?
A cooler carrying refrigerated perishables should remain at 40°F (4°C) or below. Use a thermometer inside the food zone because ice presence and exterior coolness do not confirm the temperature around every package.
Where should the thermometer go inside the cooler?
Place it near the center of the perishable foods, where it can be read quickly, but not directly against ice or a frozen pack. In a large cooler, a second sensor near the top can identify a warmer zone.
How often should I check the cooler during a road trip?
Check after packing, at planned stops, after repeated opening, following heat exposure, and at arrival. More frequent checks are appropriate when ice is melting quickly or the cooler is kept outside the air-conditioned cabin.
Does organic food spoil faster in a travel cooler?
Organic status alone does not determine spoilage speed or safe holding temperature. Ingredients, processing, packaging, starting temperature, and time outside refrigeration matter more, so follow the same cold-storage rules used for comparable perishables.
Can I make warmed food safe again by adding ice?
Rechilling stops further warming but does not undo changes that occurred during temperature abuse. If you cannot establish how long a vulnerable food was warm, disposal is generally more prudent than tasting or relying on smell.